
The Set-up
In order to move a modern home off the grid, the system has to be able to support the power requirements without too much change to the lifestyle of the homeowners. In previous times, going solar meant washing clothes in a nearby stream, chopping logs for the wood burning water heater, and huddling together to watch the battery operated tv.
 Times have changed. Solar Panel prices have dropped drastically and are now considered cheap, the inverters have become sophisticated control centers, and the batteries, well, they are still the same.
But change is coming; battery prices and options are expanding rapidly and it will not be long before the solar industry enjoys the same progress as the electric vehicle industry, in fact, as a direct result of that industry. Did we mention we have an EV? We purchased a Nissan Leaf in 2013, and love it. But that's another story.
In this article, I will detail how we achieved our off-grid status. There's a lot of good equipment on the market and lots of ways to get to the same objective, but this is how we did it. No approach is bad (unless it is actually bad), and the reader should research a lot and ask a lot of questions. Our system is a work in progress, in fact everything we are doing is a solar experiment, so you don't have to and we will post more updates as we develop this installation further.
Inverter

The intriguing part of the Radian was the more sophisticated modes, namely Mini-Grid and Grid-Zero. Mini-Grid allows you to use your battery power until depleted to a configured level, then the inverters takes power from the grid to feed the loads, as well as charge the batteries. As we have very reliable sunshine, we decided we did not want the battery charge feature, so we set the charge rate to zero. We stay on grid until the solar charge controller raises the voltage to 54 volts, at which time all the loads revert to solar. While this means using some grid power, it makes the system very robust, ensuring that there is never a power outage due to low batteries. It also protects the batteries from deep discharge, which will damage them.
Grid-Zero is a new approach. Outback saw the potential for battery based systems to provide most of a home's power while using the grid for larger loads and cloudy days. The Grid-Zero mode mixes grid power with battery power, keeping both sources inline all the time and switching larger, short term loads to grid to prevent low battery voltage issues. By doing this a homeowner can utilize their full solar resource but have a smaller battery system. The idea is very clever and should have a large impact, particularly in countries where grid export is not allowed.
Outback have been making solid inverters for years, in fact we have been using an Outback VFX3648 to power our warehouse for years, and we weld and use power tools without any issue. The earlier models are very reliable and good value, but they lack some of the advanced features of the Radian, such as 240V output and the advanced configuration modes.
The Radian also comes with a GSLC, or Load Center, which contains the termination bars, shunts, and breakers to safely wire the system. I would not try installing the Radian without one.
MATE3

The unit is networked, has a web interface, and controls the configuration of the inverter(s).
OpticsRE

Solar Panels
In truth, solar panels are solar panels. While we prefer Canadian Solar for our commercial grid tied work because of their reputation and warranty, for small off-grid systems the choice of panel is less of an issue. Solar panels have become a commodity item over the last few years due to the rise of the Chinese manufacturers. However, for off-grid systems, it is normally prefered to use 12V panels, just because you can string more of them together. Most solar charge controllers will allow a maximum voltage of 150V, and that limits you to three 24V panels in series. With 12V panels, you can string six together in series.We got around this limitation by using Morningstar’s TriStar MPPT 600V charge controller (TS-MPPT-600V) which allowed us to move our previously grid tied 600V system to off-grid without rewiring.
Our rooftop is covered by a number of pieces of solar equipment. For the off-grid system, we have 20 BP3175 panels or 3,500 watts, a 175W polycrystalline solar panel made by BP (the oil company) while they cared about having clean air to breathe. We have had them for about seven years now, and they don't owe us anything. I recently seen 3,400 watts of power coming through the charge controller, so they are still putting out full power. If anyone tries to tell you solar panels only last five years, laugh and walk away.
Charge Controller

It is also connected to our network, of course, and so we can read the setting and values remotely.
Batteries
Ahh, batteries, how I hate you...
But help is on the way. New technologies such as LiFePO4 and Aquion are on the horizon or are available, and over time trends will establish the new leaders in this technology. I expect that in five years we will not use a lot of Lead Acid batteries in solar systems.
For now, one must buckle up and learn to maintain our batteries.
We chose Trojan IND batteries, which are tough industrial batteries with long life times.
Battery Watering
Keeping the battery electrolyte levels where they should requires diligence. A watering system makes it a whole lot easier. We use and can recommend the Trojan Hydrolink system.
Battery Box
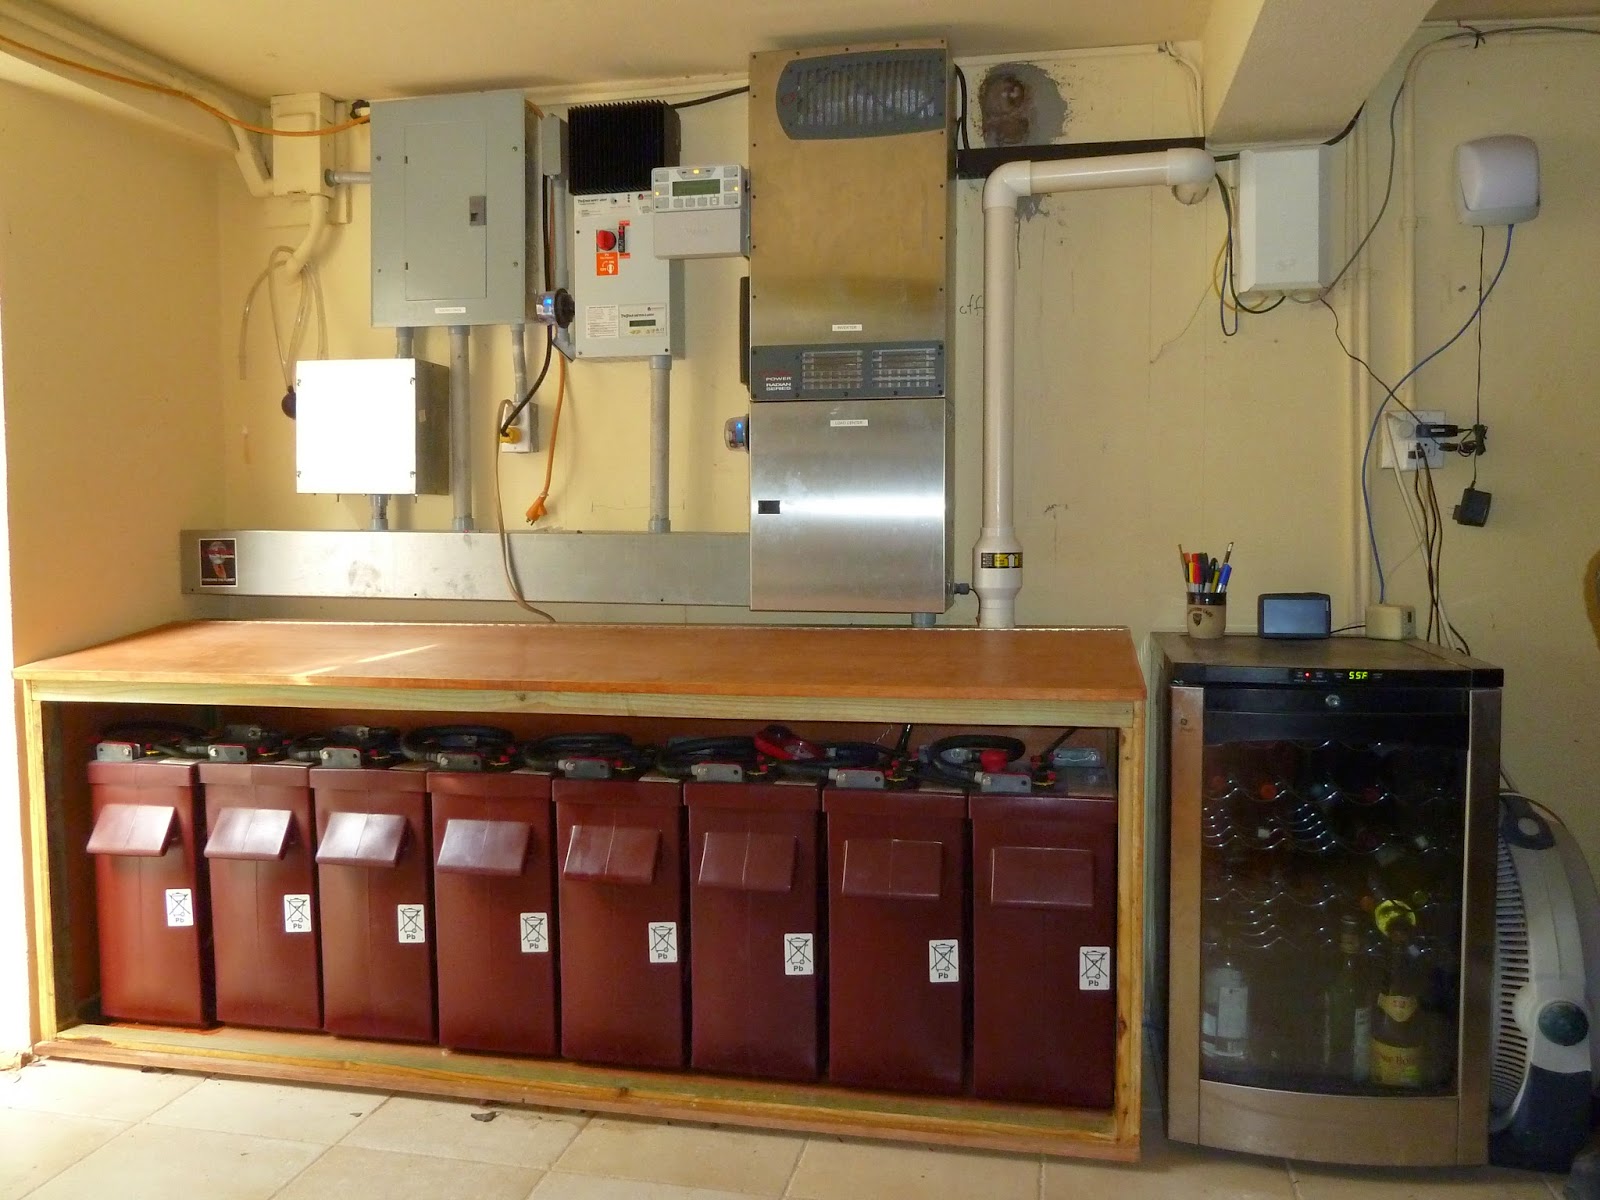 We chose to install the batteries in a box to keep them out of sight (as they are in the kitchen), and to keep the fumes from choking us. A battery box is one of those fun projects that I love to work on, so I made my own box. And it only took
 Vent Fan
Most of the industry uses the Zephyr Vent fan as it is robust and works great. Read the instructions, do not glue the pipe.We chose the 12V unit as we connected it to the Radian's Aux Connection in Vent Fan mode, which allows it to turn the fan on when the solar charge controller is charging the batteries. It does not need to run any other time.
Battery Monitor
Monitoring the battery properly requires a State Of Charge meter, and Outback kindly provides one. The FNDC integrates with the Load Center and monitors the battery current and voltage. It can tell how much power went into the battery and how much came out, and so computes the State Of Charge very accurately. It also has a handy-dandy AUX contact, more on that later.Load Management
 |
| Raspberry Pi system |
Heavy loads
In our configuration, we have an abundance of solar power after the batteries are charged, typically after midday. In the Caribbean, there are very few days when the system does not fully charge.
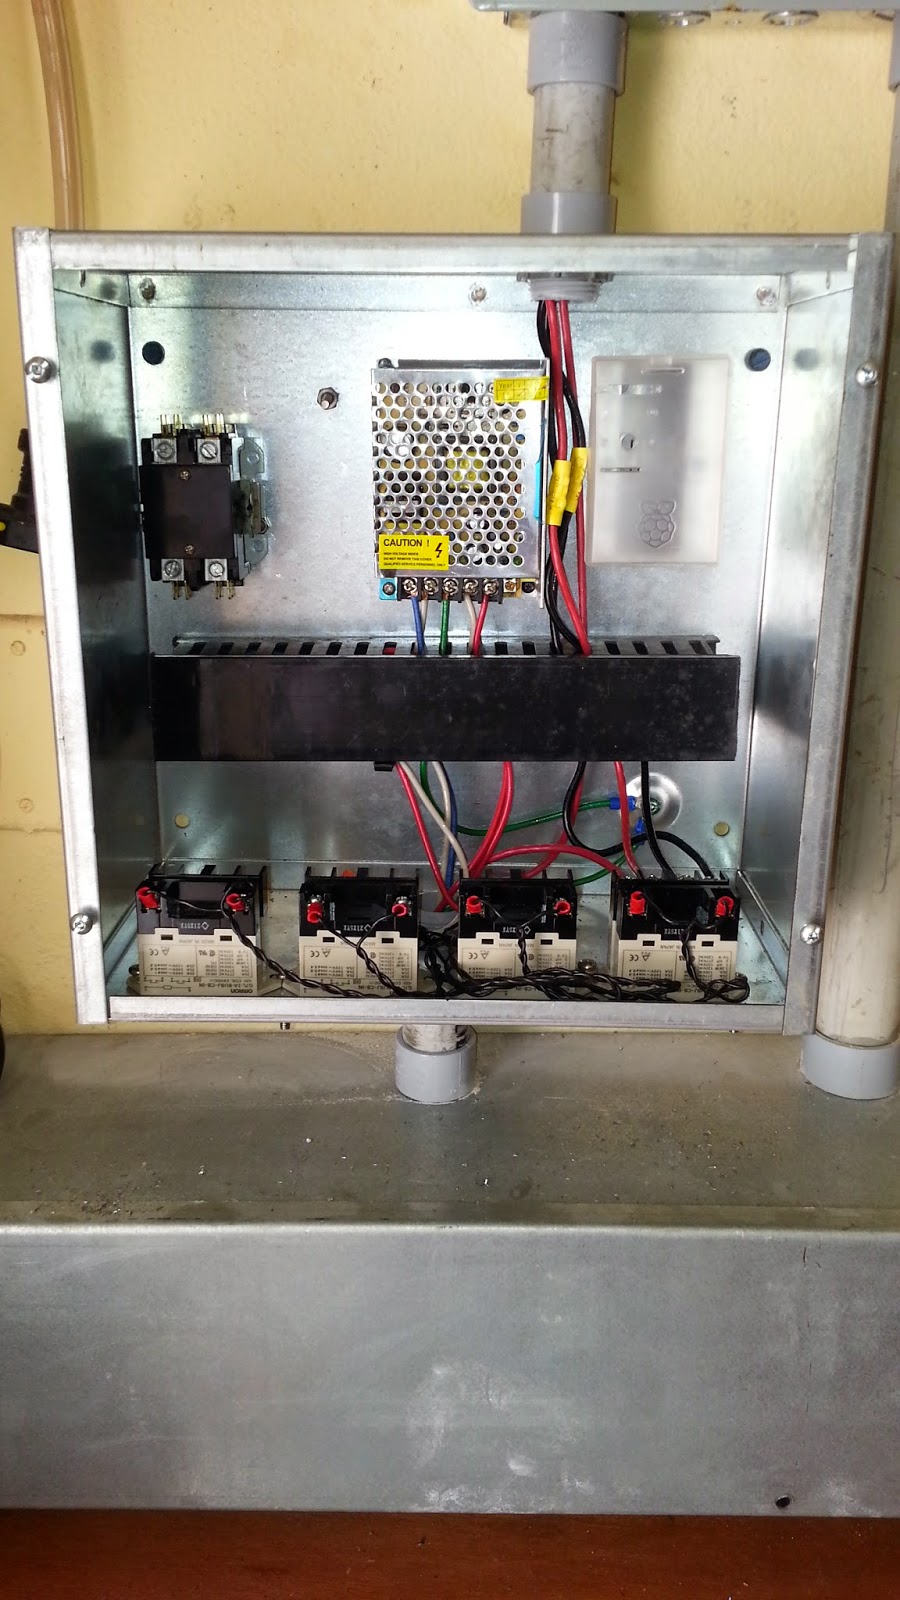
Once charged, the solar power is largely wasted, as it cannot charge the batteries any more, and there is only the loads to use it. So we wanted to be able to use heavy load equipment for those times, but not allow them to drain our batteries.The FNDC has it's own AUX contact that can switch up to 30V DC. I installed a 24V DC power supply and four 24V DC relays to switch loads. Programming the FNDC AUX contact is done through the MATE3 display under the Battery Monitor settings.
By using these settings, we can dry clothes in the electric dryer or charge the electric car without risk of depleting our batteries. The Load Management is set to turn off these heavy loads when the State of Charge is below 90%, or the voltage is less than 50V.
In the near future we will enhance the Load Manager with a Raspberry Pi based system (top right) to actively manage the loads. Watch this space!
Installation
Installing an off-grid solar is not a simple task if you want a polished, professional appearance, as well as a safe and reliable system. For most people, it's better to get someone like me to do it. But if you have reasonable electrical and mechanical skills, and a lot of tools, it's a great project.Good luck with it.
No comments:
Post a Comment
Note: only a member of this blog may post a comment.